Table of Contents
What You’ll Learn in This Guide
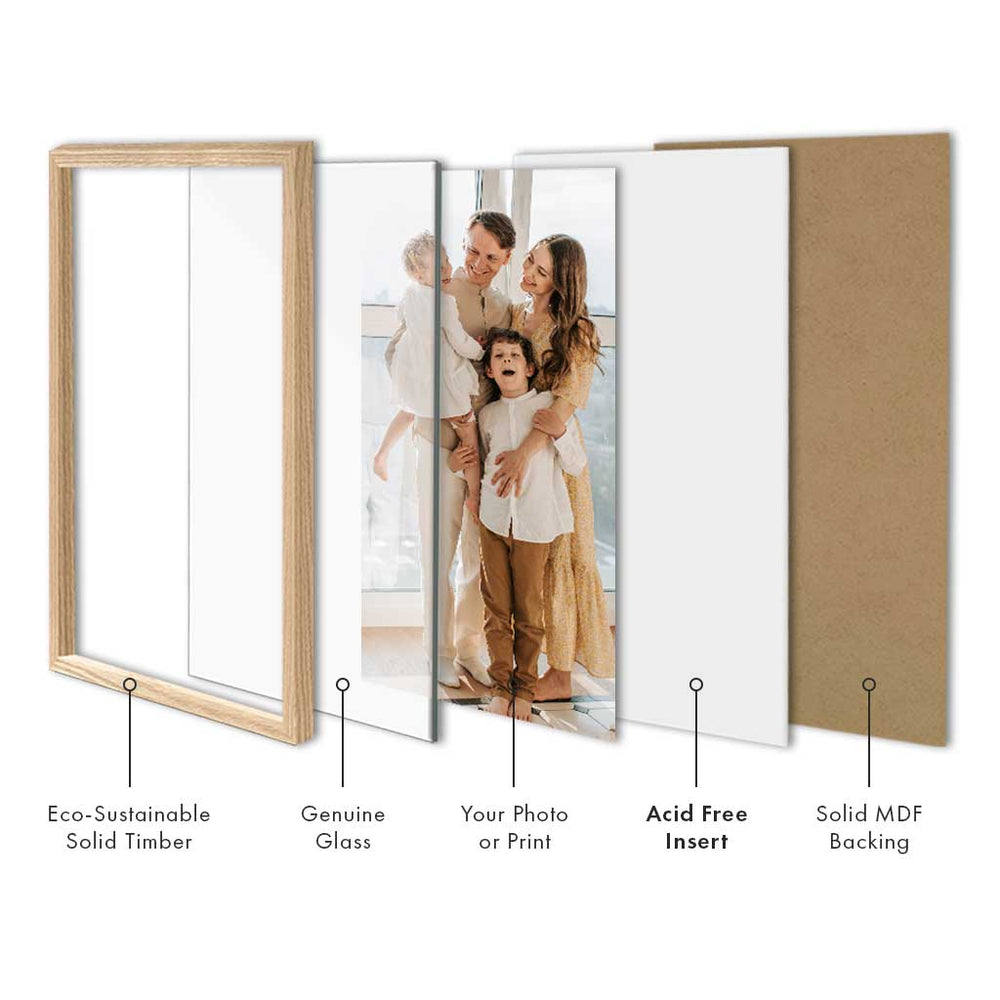
Attaching wire to the back of a picture frame is a quick and simple task, but doing it correctly is important for safety, stability, and ensuring your artwork hangs level. This step-by-step guide walks you through the exact method to use, including where to place your D-rings, how to tie picture wire securely, and how much slack to leave for proper hanging.
Most Profile Australia frames include a complementary hang pack with wire, D-rings, and screws. We also offer upgraded hanging kits for heavier or larger frames. Written by our in-house expert picture framer, this guide is designed to help you get a perfect result every time.
Let’s get started.
How to Attach Picture Wire to a Frame (Step-by-Step)
You can follow along using the helpful video tutorial below or continue scrolling to read through the full visual step-by-step guide. Both methods walk you through the professional framing technique for attaching picture wire safely and securely.
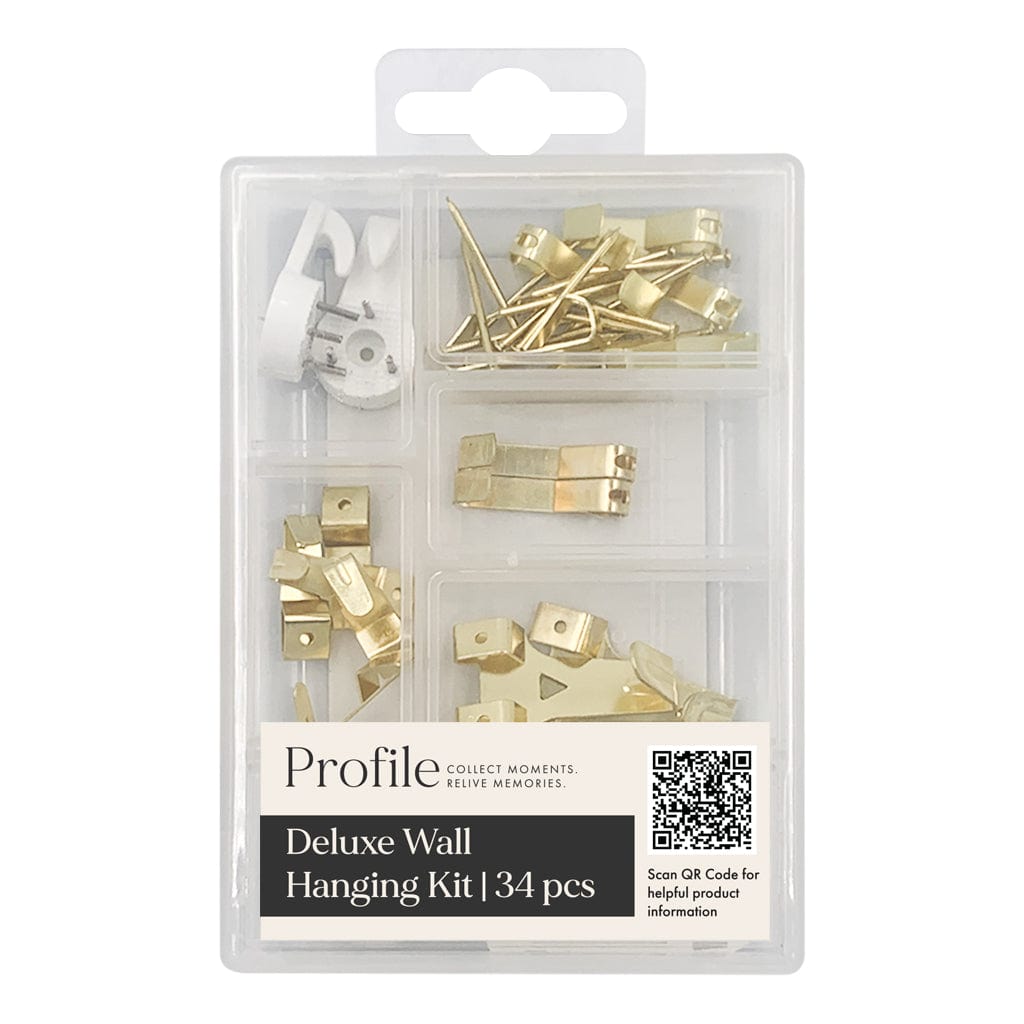
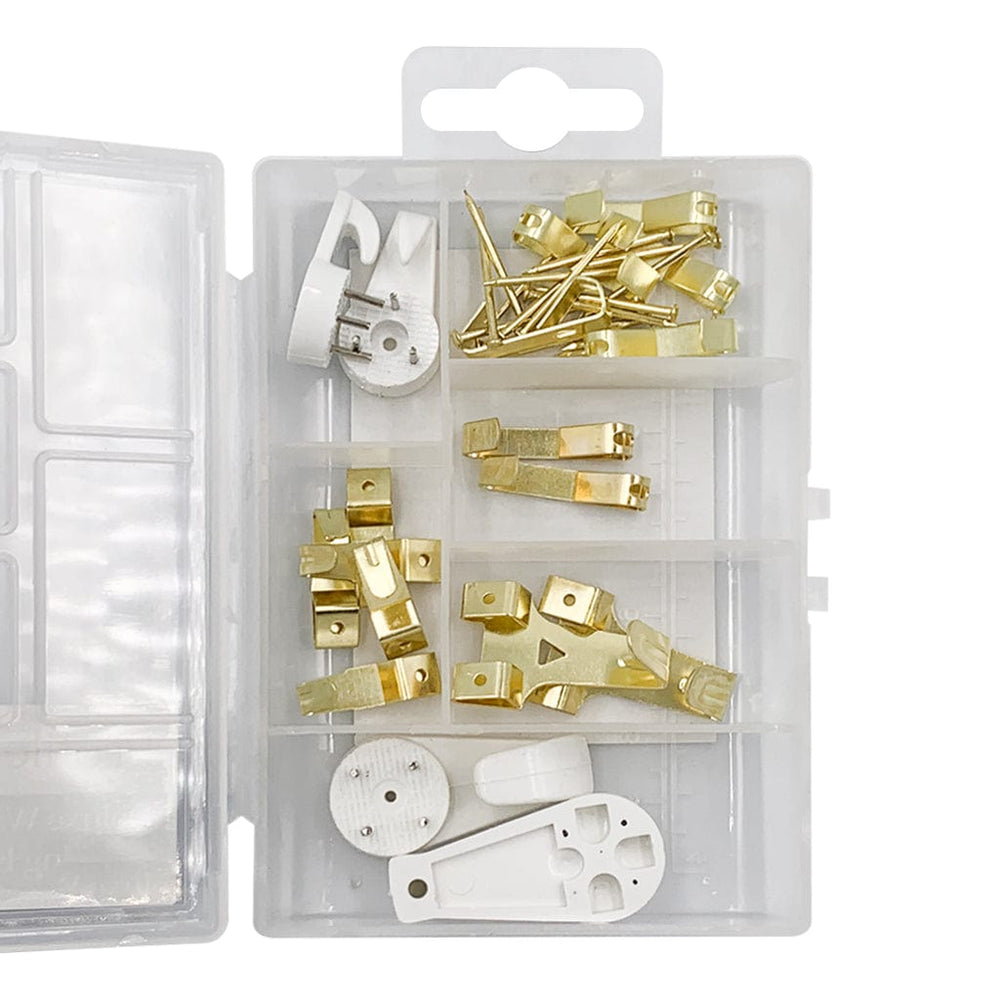
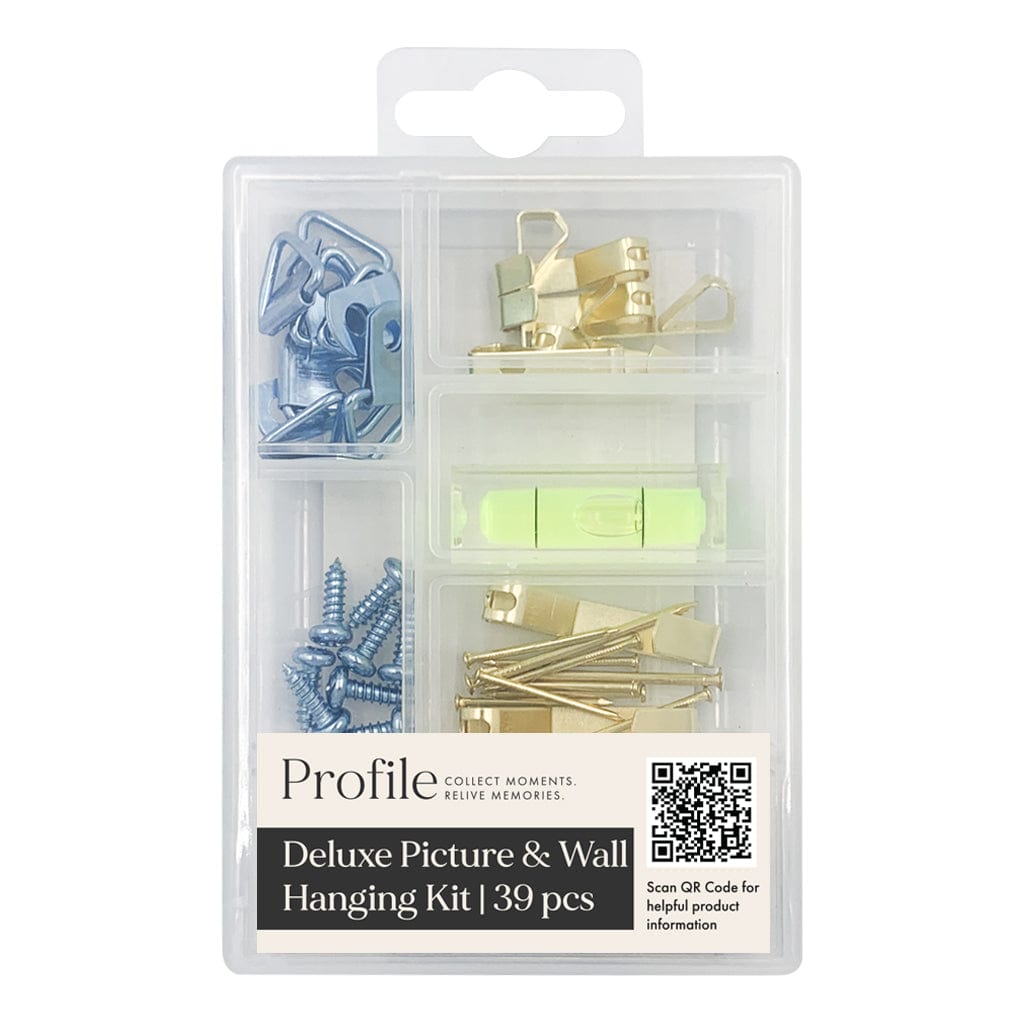
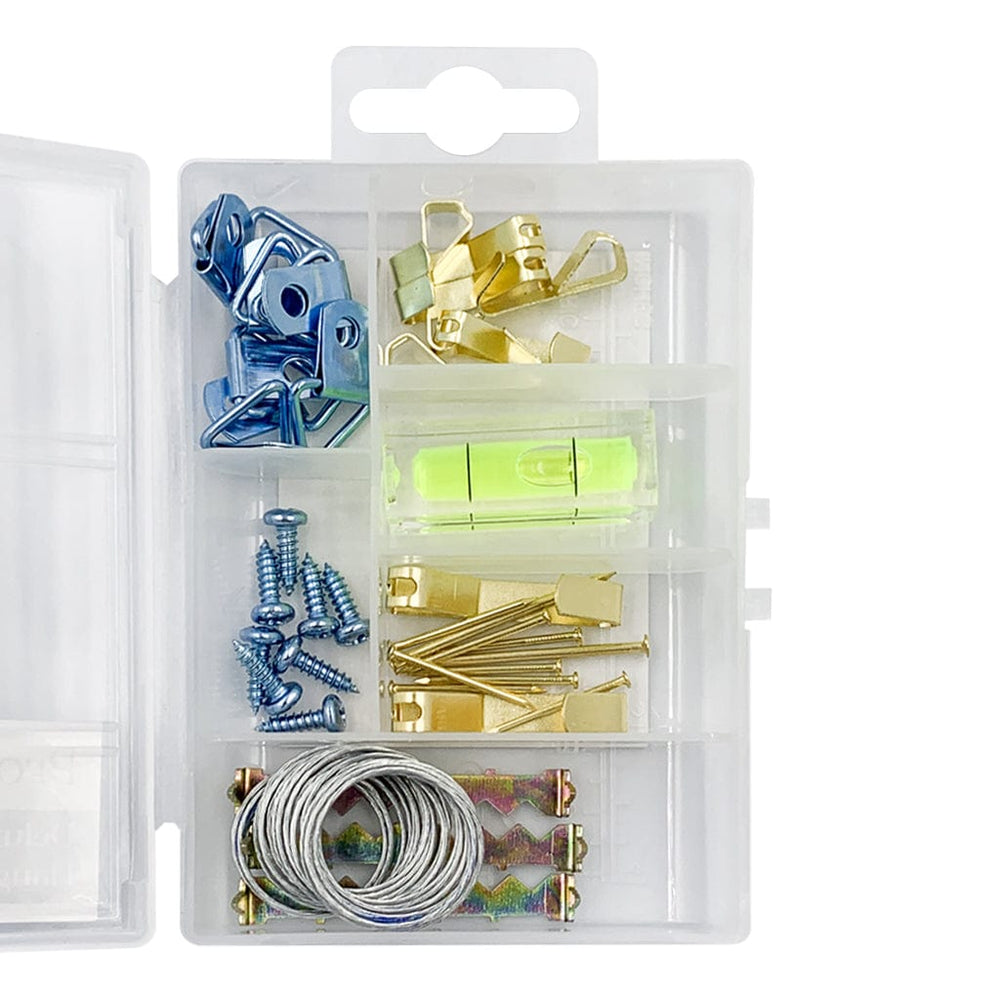
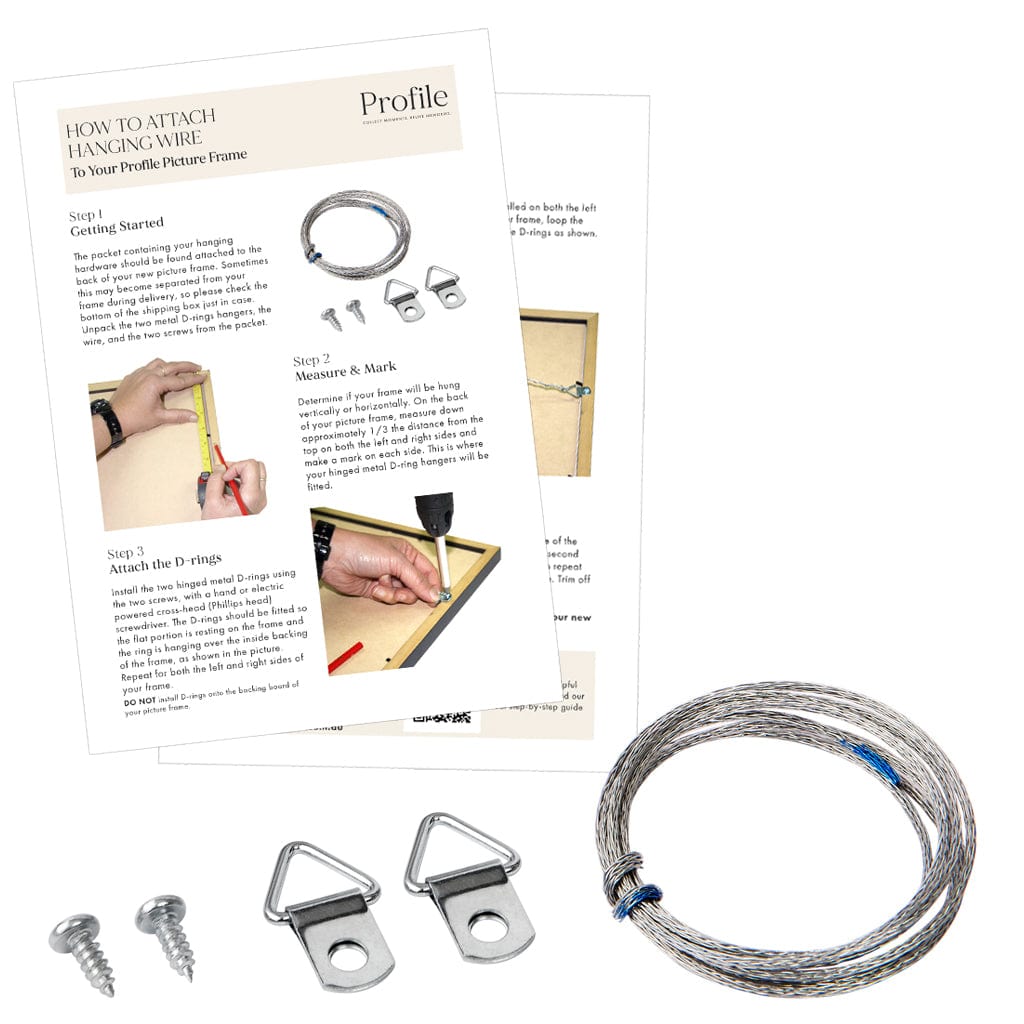
What’s Included in Your Hanging Pack
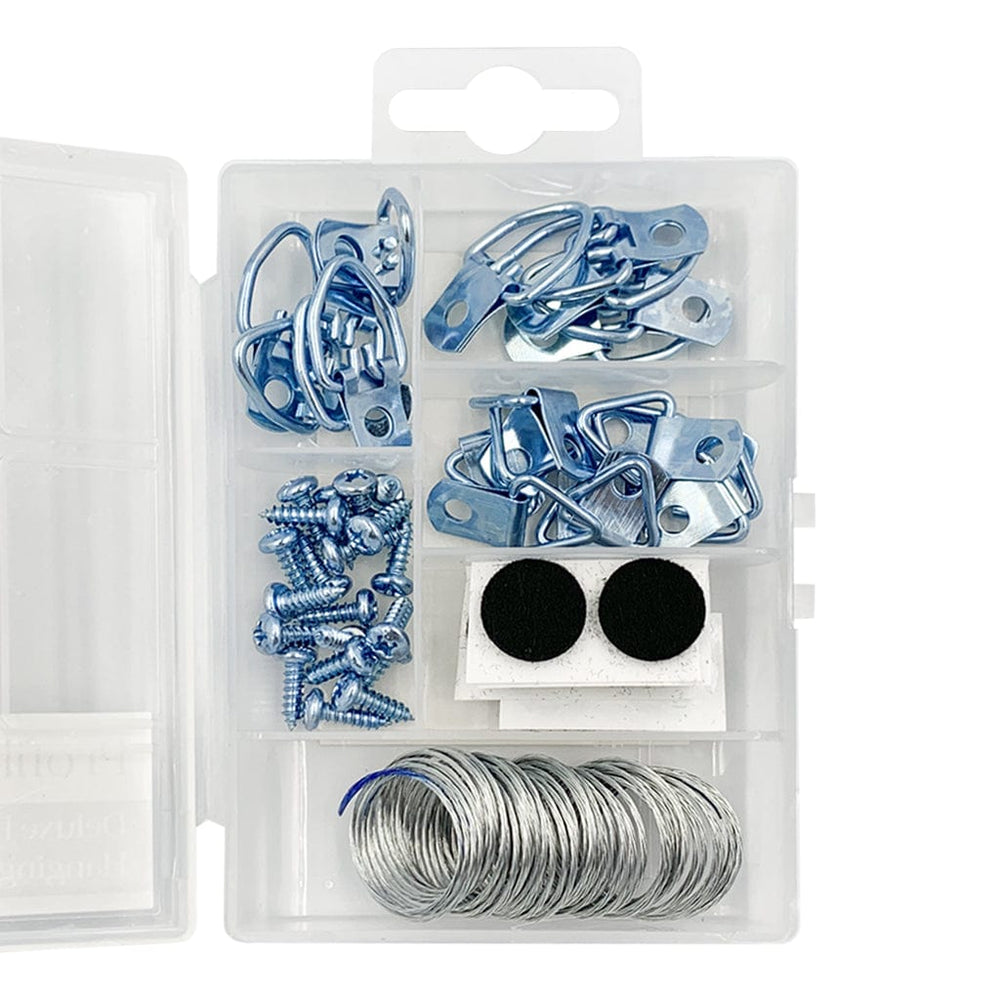
Most Profile Australia frames come with everything you need to install picture wire. Inside the hang pack, you’ll find:
- 2 x Hinged D-ring hangers
- 2 x Timber screws
- 1 x Length of picture hanging wire
- Printed instruction sheet (with a QR code linking back to this guide)

If you're working with a larger or heavier frame, or prefer upgraded hardware, you can explore our full range of optional frame accessories here:
Popular options include:
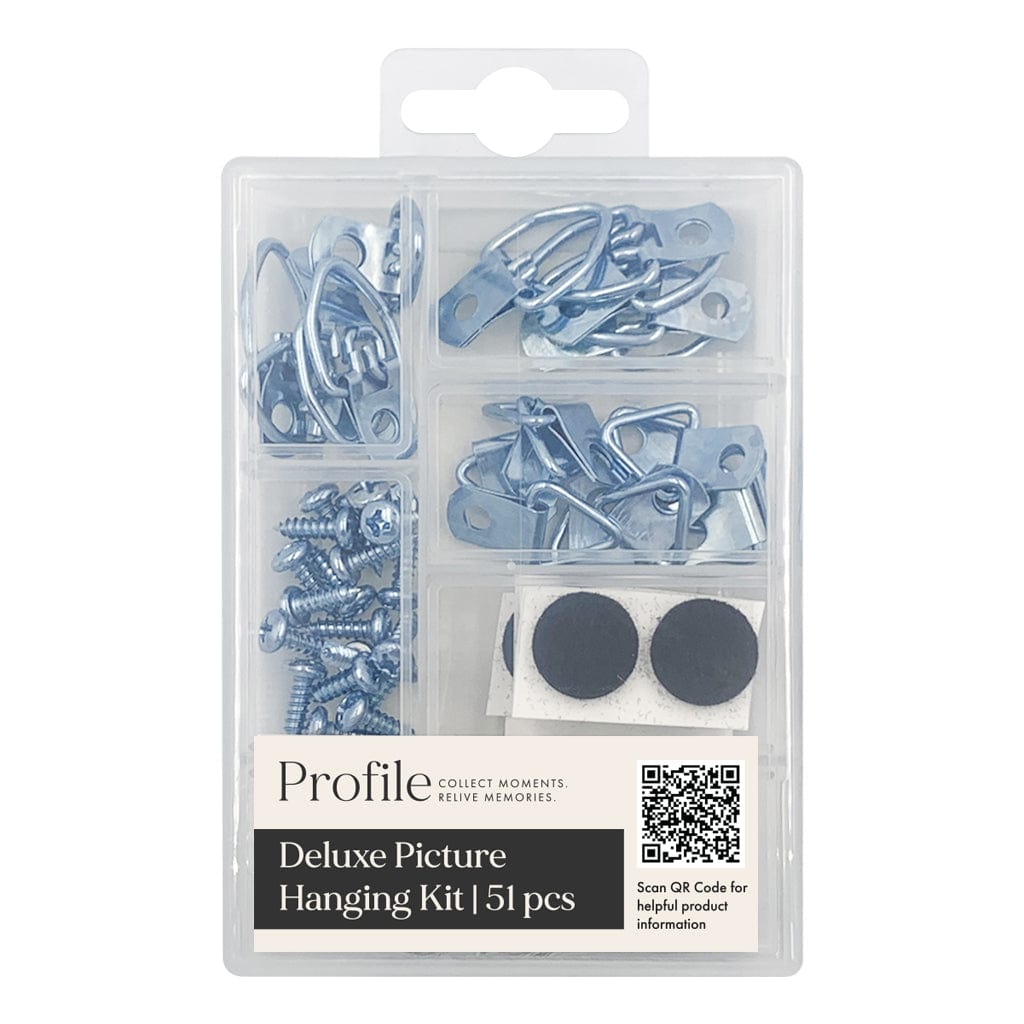
- Deluxe Picture Hanging Kit (51pcs)
- Deluxe Picture & Wall Hanging Kit (39pcs)
- Easy-Twist Plastic-Coated Picture Wire (11kg or 20kg)
- Heavy-Duty D-ring Hangers
- Steel Anchor Plate Hangers
- Wood Screws (10mm)
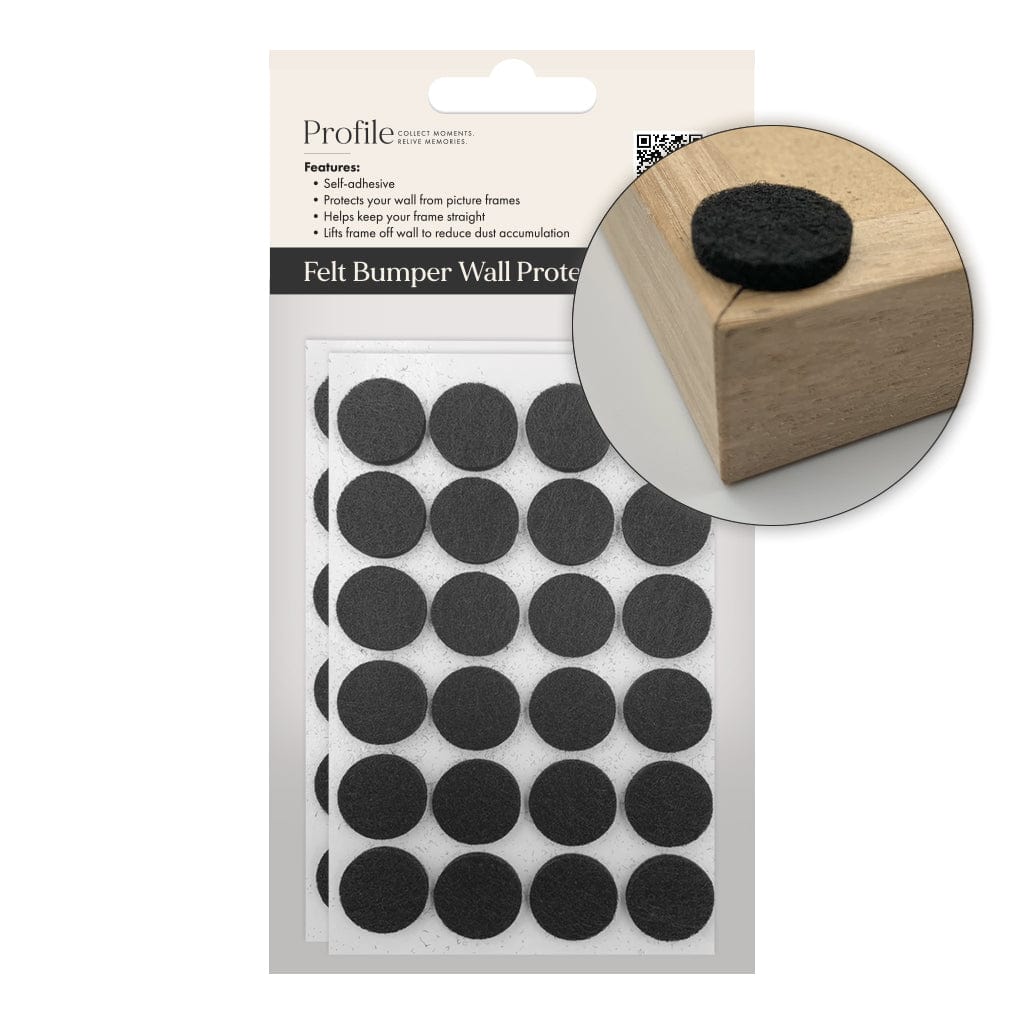
- Black Felt Bumper Wall Protectors
These products provide additional strength, stability, and finishing touches for secure, precision hanging.
Tools You’ll Need
Before you begin, gather the tools you’ll need to attach picture wire to your frame. Most of these are common household items:
- Ruler or tape measure (For accurate placement of your D-rings)
- Pencil (To mark your measurement points)
- Phillips-head screwdriver (A cross-head driver suitable for timber screws)
- Scissors or wire cutters (To trim the picture wire cleanly)
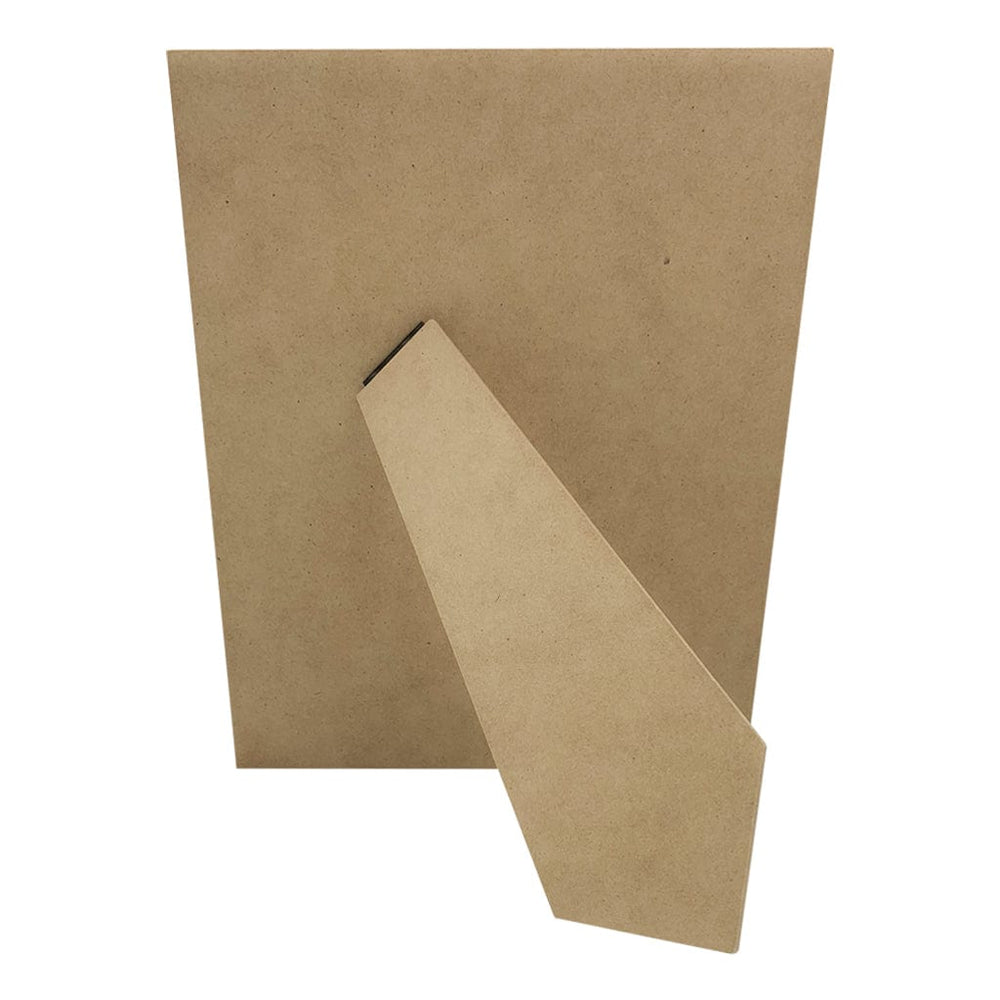
- Your picture frame (Place it face-down on a clean, flat surface)

Step 1: Measure One-Third Down the Frame
Place your picture frame face-down on a clean, flat surface. Using your ruler or tape measure, measure the full height of the frame.
Next, calculate one-third of that total height. This is the standard placement point for D-rings and picture wire, as it provides the best balance, reduces stress on the frame, and helps your artwork hang level on the wall.
Use your pencil to lightly mark this one-third measurement on both the left and right inner sides of the frame. These marks will guide where the D-rings will be installed in the next step.

Step 2: Mark the Same Point on the Opposite Side
Repeat the same measurement on the opposite side of the frame. Measure one-third down from the top edge and place a small pencil mark.
Double-check that both pencil marks are positioned at exactly the same height. Even a small difference can cause your frame to tilt once it’s hung, so this quick check ensures your D-rings and, ultimately, your picture wire sit perfectly level.
Step 3: Attach the First D-Ring Hanger
Position your first hinged D-ring directly over the pencil mark you made on one side of the frame. Make sure the triangle of the D-ring is facing inward, toward the centre of the frame. This ensures the picture wire will pull evenly once installed.
Using your Phillips-head screwdriver, insert the screw through the D-ring plate and into the timber. Apply firm, steady pressure as you turn the screw so it bites cleanly into the frame. The D-ring should sit flat and secure against the wood, without wobbling or movement.
If you're working with a hardwood frame or a thicker moulding, you may find it easier to create a small starter indentation with the screwdriver tip before driving the screw in.

Step 4: Attach the Second D-Ring Hanger
Repeat the same process on the opposite side of the frame. Position the second D-ring directly over your pencil mark, again ensuring the triangle is facing inward toward the centre of the frame.
Insert the screw and tighten it firmly with your Phillips-head screwdriver. Both D-rings should now sit flat, secure, and aligned at the exact same height. This alignment is essential, as it ensures your picture wire will sit evenly and your frame will hang straight on the wall.
If either D-ring shifts or feels loose, tighten the screw until both fittings feel stable and secure.
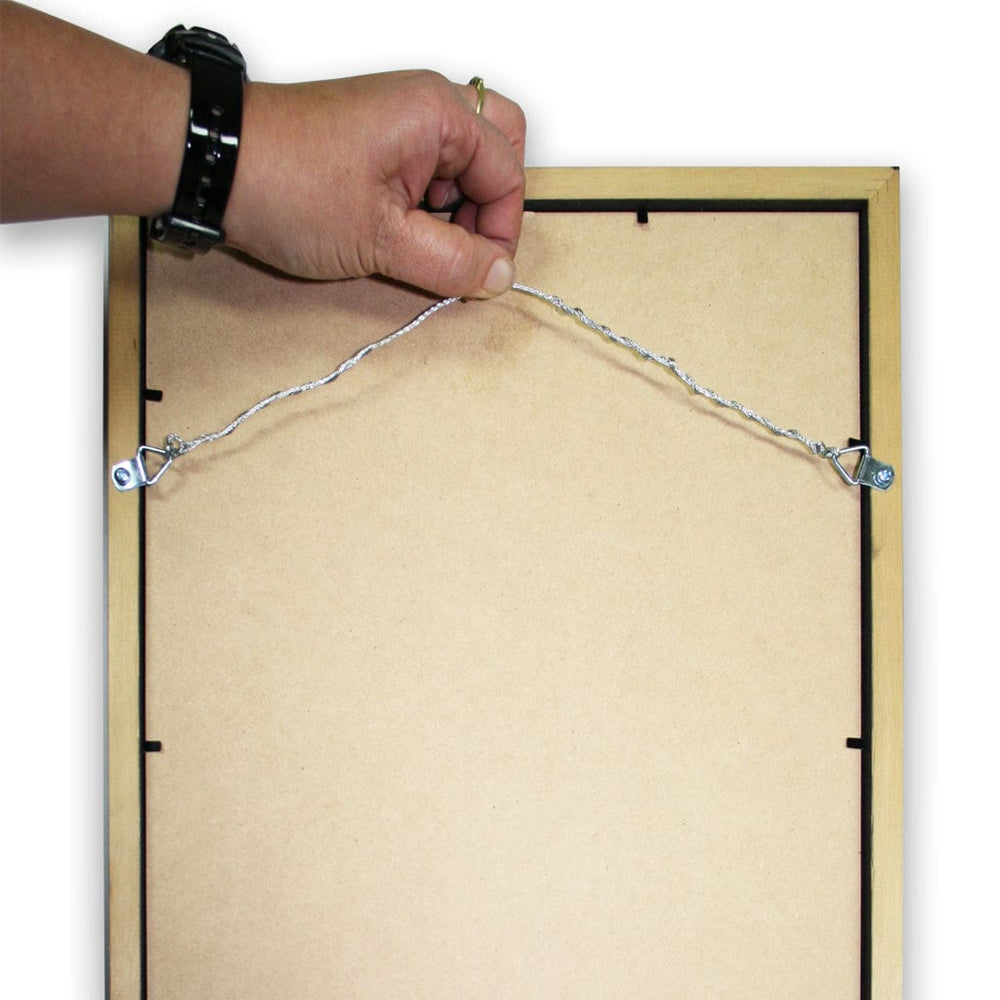
Step 5: Thread the Picture Wire Through the First D-Ring
Unwind a suitable length of picture wire from your hang pack or upgraded wire spool. Starting on one side of the frame, feed the wire through the triangle opening of the first D-ring.
Pull through enough length so you can comfortably create a secure fastening. Wrap the loose end of the wire back around the main wire several times. This is the standard double-back wrap technique used by professional framers. It creates a strong, reliable hold that won’t slip under tension.
The finished wrap should look neat, tight, and firmly anchored against the D-ring.

Step 6: Trim and Neaten the Wrapped Wire
Once the wire is securely wrapped around itself, use scissors or wire cutters to trim off any excess. Twist any short remaining tail neatly around the main wire so it sits flush and doesn’t protrude.
This helps ensure the wire won't scratch the back of your frame and keeps everything tidy before you move on to the next side.

Step 7: Thread the Wire Through the Second D-Ring and Secure It
Take the free end of the picture wire and feed it through the triangle opening of the second D-ring. Pull the wire across until it sits evenly between both sides, removing any unnecessary slack.
Before fastening, allow the wire to relax slightly to form a gentle arc. This slack is important for proper hanging and ensures the wire rests comfortably on your wall hook.
Once positioned, wrap the loose end of the wire back around the main wire several times using the same double-back wrap technique from Step 5. This creates a strong, secure hold that won’t loosen over time.

Step 8: Trim and Neaten the Remaining Wire
After securing the second side, trim off any excess wire with scissors or wire cutters. Twist the short tail neatly around the main wire so it sits flush and doesn’t stick out.
A tidy wrap not only looks cleaner but also prevents any sharp wire ends from catching on the backing board or scratching your wall.

Step 9: Check for the Correct Amount of Slack
Gently lift the wire from the centre to check the amount of slack. The wire should rise into a soft arc, usually around 5–7 cm, depending on the size of your frame.
This slack is important - too tight, and the wire may place unnecessary stress on the D-rings or cause the frame to tilt forward on the wall. Too loose, and the frame may hang too low or feel unstable.

If you’re working with a larger or heavier frame (typically A1 and above), you may want to consider using two wall hooks instead of one for better stability and weight distribution. We’ve created a dedicated guide that explains why and how this method works:
If the wire feels overly tight or uneven, simply loosen the wrap on one side, adjust, and re-secure it using the same double-back wrapping technique.
Step 10: Tighten All Screws and Check the Hardware
Before hanging your frame, give both D-rings a final check. Use your Phillips-head screwdriver to make sure the screws are firmly tightened and that each D-ring sits flat and secure against the timber.
Both D-rings should be aligned, stable, and pointing inward. Gently press on them to confirm there is no movement. A secure fitting ensures the picture wire takes the weight evenly once the frame is on the wall.
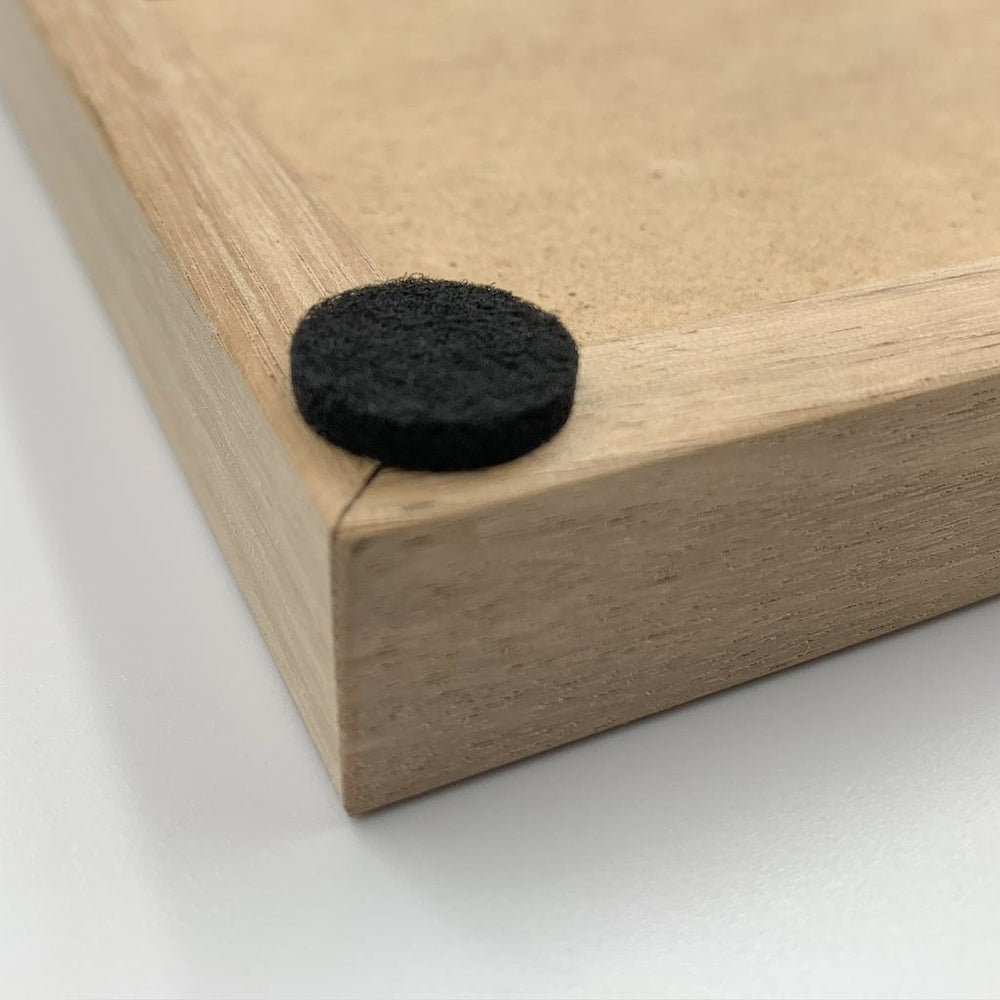
For an even better finish, you can add felt bumpers to the bottom corners of the frame. These help keep your frame level on the wall and prevent scuffing or movement over time.
Step 11: Your Frame Is Now Ready to Hang
With your wire securely attached and the hardware double-checked, your picture frame is now ready for the wall. Gently lift the frame, hold it up to your chosen spot, and visualise how it will look in your space. This final step is where the practical work you’ve done turns into something meaningful - displaying photos, artwork, or memories that make your home feel personal and complete.
If you’re new to hanging frames or want tips for positioning, levelling, or choosing the right hook for your wall type, we’ve created a few helpful guides you can explore next:
- How to Hang a Picture Frame on Your Wall
-
How to Hang a Gallery Photo Wall Like an Expert
- The Ultimate Guide to Picture Hanging on Your Wall
Once your frame is on the wall, step back and enjoy the finished result - a beautifully presented piece that brings your space to life and reflects your personal style.
Frequently Asked Questions
1. Where should I put D-rings on a picture frame?
D-rings are usually placed about one-third of the way down from the top of the frame. This position helps the frame hang level, reduces forward-leaning, and distributes weight correctly. Larger frames may benefit from using two wall hooks for added stability.
2. How tight should picture hanging wire be?
Picture wire should have a gentle arc, typically 5–7 cm when pulled upward from the centre. Too tight may stress the hardware or cause the frame to tilt; too loose may make positioning difficult.
3. How do I tie picture frame wire securely?
Use the double-back wrap technique: thread the wire through the D-ring, loop it back around the main wire, and wrap it tightly 4–6 times. Trim the excess and press the tail flat so it sits neatly against the frame.
4. Can I use cord instead of picture wire?
Cord isn’t recommended for most frames. It can fray, stretch, or snap over time. Braided steel picture wire or plastic-coated Easy-Twist wire provides safer, more reliable hanging performance, especially for heavier or larger frames.
5. What size picture wire do I need?
Choose wire based on the weight of your frame, not the size. For example:
- Light frames: standard wire from the hang pack
- Medium frames: Easy-Twist 11kg wire
- Large or heavy frames: Easy-Twist 20kg wire or heavy-duty D-rings
When in doubt, always choose wire with a higher weight rating than your frame.
6. Do I need two hooks for large picture frames?
For oversized frames (A1 and above), using two wall hooks instead of one provides better weight distribution, prevents tilting, and keeps the frame stable over time. See our guide: Why You Should Hang Large Frames with Two Wall Hooks.
7. What tools do I need to attach picture wire?
A ruler or tape measure, pencil, Phillips-head screwdriver, and scissors or wire cutters are usually all you need. These tools allow you to mark, secure, and trim the wire accurately.
8. How do I stop my picture frame from tilting on the wall?
Make sure your D-rings are level and the wire has the correct amount of slack. Adding felt bumpers to the bottom corners of your frame also helps keep it straight and prevents sliding or scuffing.
9. Are the screws included in the hang pack safe for all frame types?
Yes. The included timber screws are suitable for all Profile Australia timber frames. For heavier frames or specialised installations, upgraded screws or anchor plate hangers may be preferred.
10. Why don’t Profile Australia frames come with the wire already attached?
We’re often asked why our frames don’t arrive with the picture wire pre-installed. The reason is that we don’t know which orientation you plan to use - portrait (vertical) or landscape (horizontal).
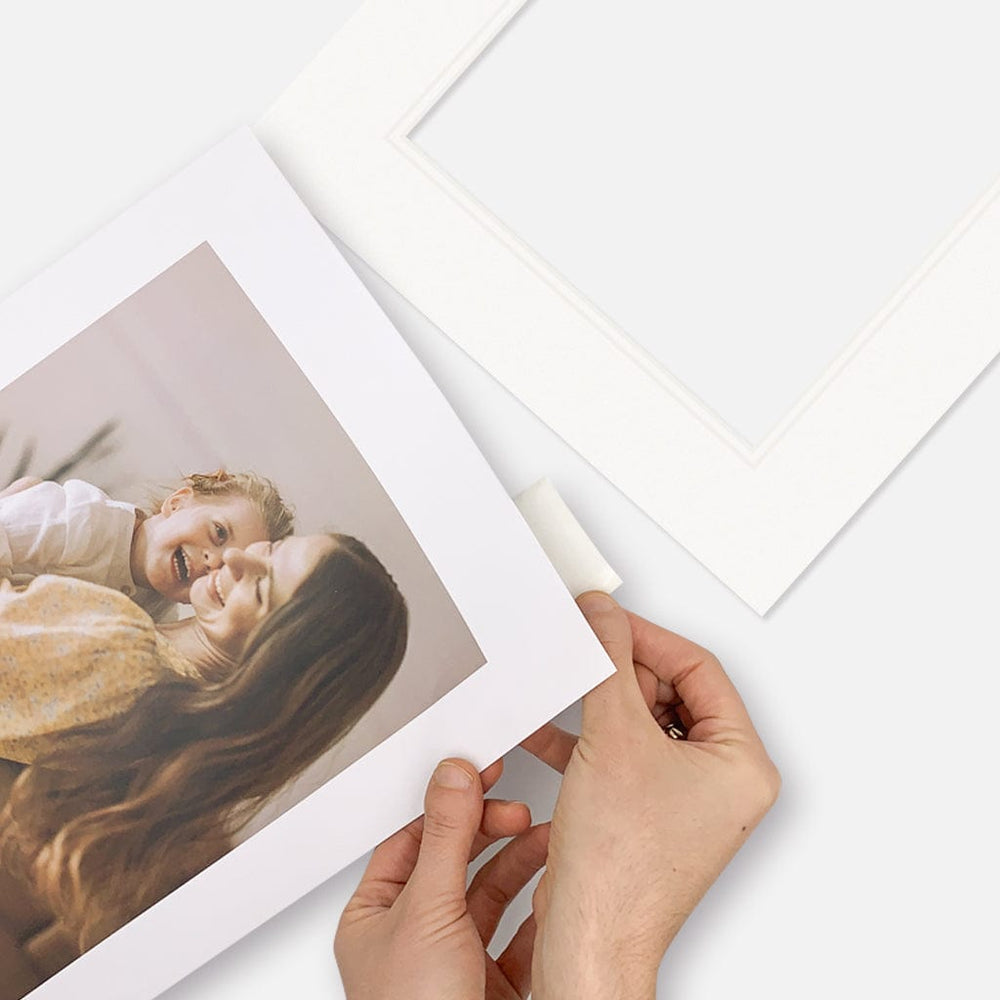
If wire were attached in both directions, the backing board couldn’t be opened, and you wouldn’t be able to insert your photo, certificate, artwork, or print. Leaving the wire unattached keeps the frame fully accessible and lets you choose the correct hanging orientation for your space.
Attaching the wire yourself is a simple, one-time step, and this guide shows you exactly how to do it safely and professionally.
Your Artwork Is Ready to Shine
Attaching picture wire is a simple step that makes a big difference to how safely and securely your artwork hangs. With your frame now ready for the wall, you can move on to positioning, levelling, and styling your space with confidence.
If you’re exploring new frames or planning a gallery wall, you’ll find Australia’s largest range of timber photo frames and display solutions on our website.